> ## Documentation Index
> Fetch the complete documentation index at: https://help-plum.xoxoday.com/llms.txt
> Use this file to discover all available pages before exploring further.
# Authenticate Domain
> Follow this step-by-step guide to authenticate your email domain so reward communications from Plum reach recipients reliably.
*Use your own custom Domain to send reward communication!*
## Understanding Domain Authentication
Domain Authentication is a crucial process aimed at confirming the ownership of a domain. Its primary goal is to ensure that emails sent from that domain are authentic and not manipulated, thus mitigating risks associated with email spoofing, phishing, and other fraudulent activities.
**Upon successful completion of Domain Authentication through the steps outlined below:**
* Recipients will no longer see "via [notifications@xoxoday.com](mailto:notifications@xoxoday.com)" next to the sender's address in the messages.
* Enhances the credibility and deliverability of emails by adding a layer of legitimacy to emails originating from the user's domain.
Check out this for entire list of benefits and why you should consider authenticating your domain [Email Domain Authentication](/account-settings/email-domain-auth/email-domain-authentication-overview)
***
## Prerequisites
Before initiating Domain Authentication, ensure the following prerequisites are met:
* Approval of KYB (Know Your Business) is mandatory.
* Only users with SuperAdmin privileges can authenticate the domain.
* Access to DNS or hosting provider is required for making necessary DNS modifications. In the absence of direct access, coordinate with your company's IT Admin responsible for DNS management.
**Pro tip:** Coordinate with your company's IT Admin responsible for DNS management. You can use the inbuilt emailing tool to send the DNS records to your IT Admin colleague.
***
## Step by step guide to Authenticate Your Domain
Ensure you are logged in as SuperAdmin with approved KYB. If not done already, head over to: Submitting Verification Details
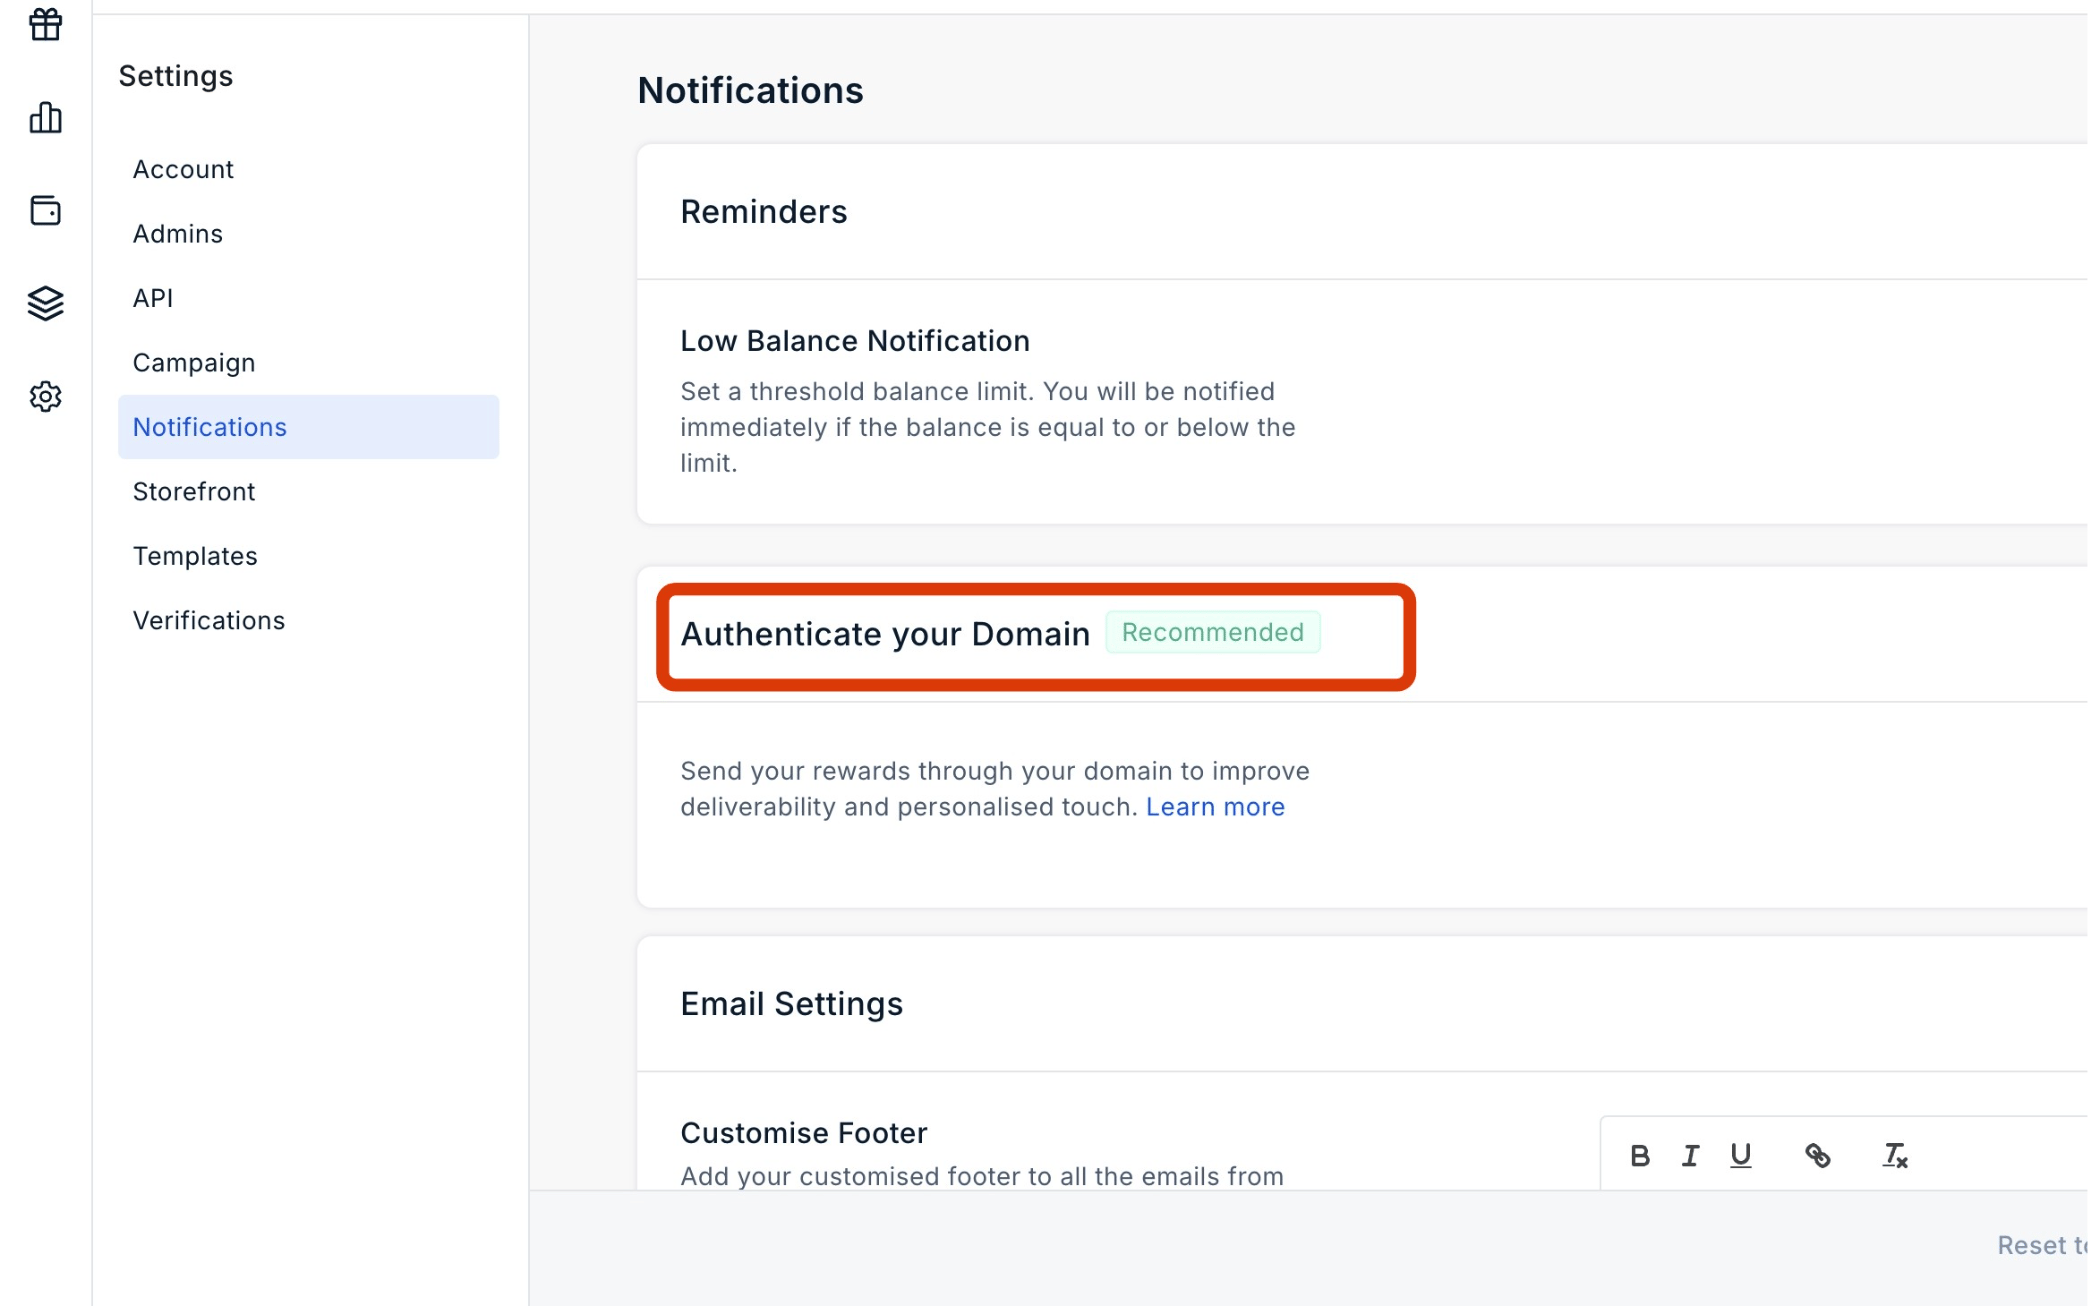
Navigate to **Settings > Notifications.** Click on **'Authenticate your Domain'.**
 Now click on **'Save and Proceed'.**
The following DNS records need to be added in your DNS Settings. Access your DNS provider portal and input these records. Note that all records are CNAME.
Now click on **'Save and Proceed'.**
The following DNS records need to be added in your DNS Settings. Access your DNS provider portal and input these records. Note that all records are CNAME.
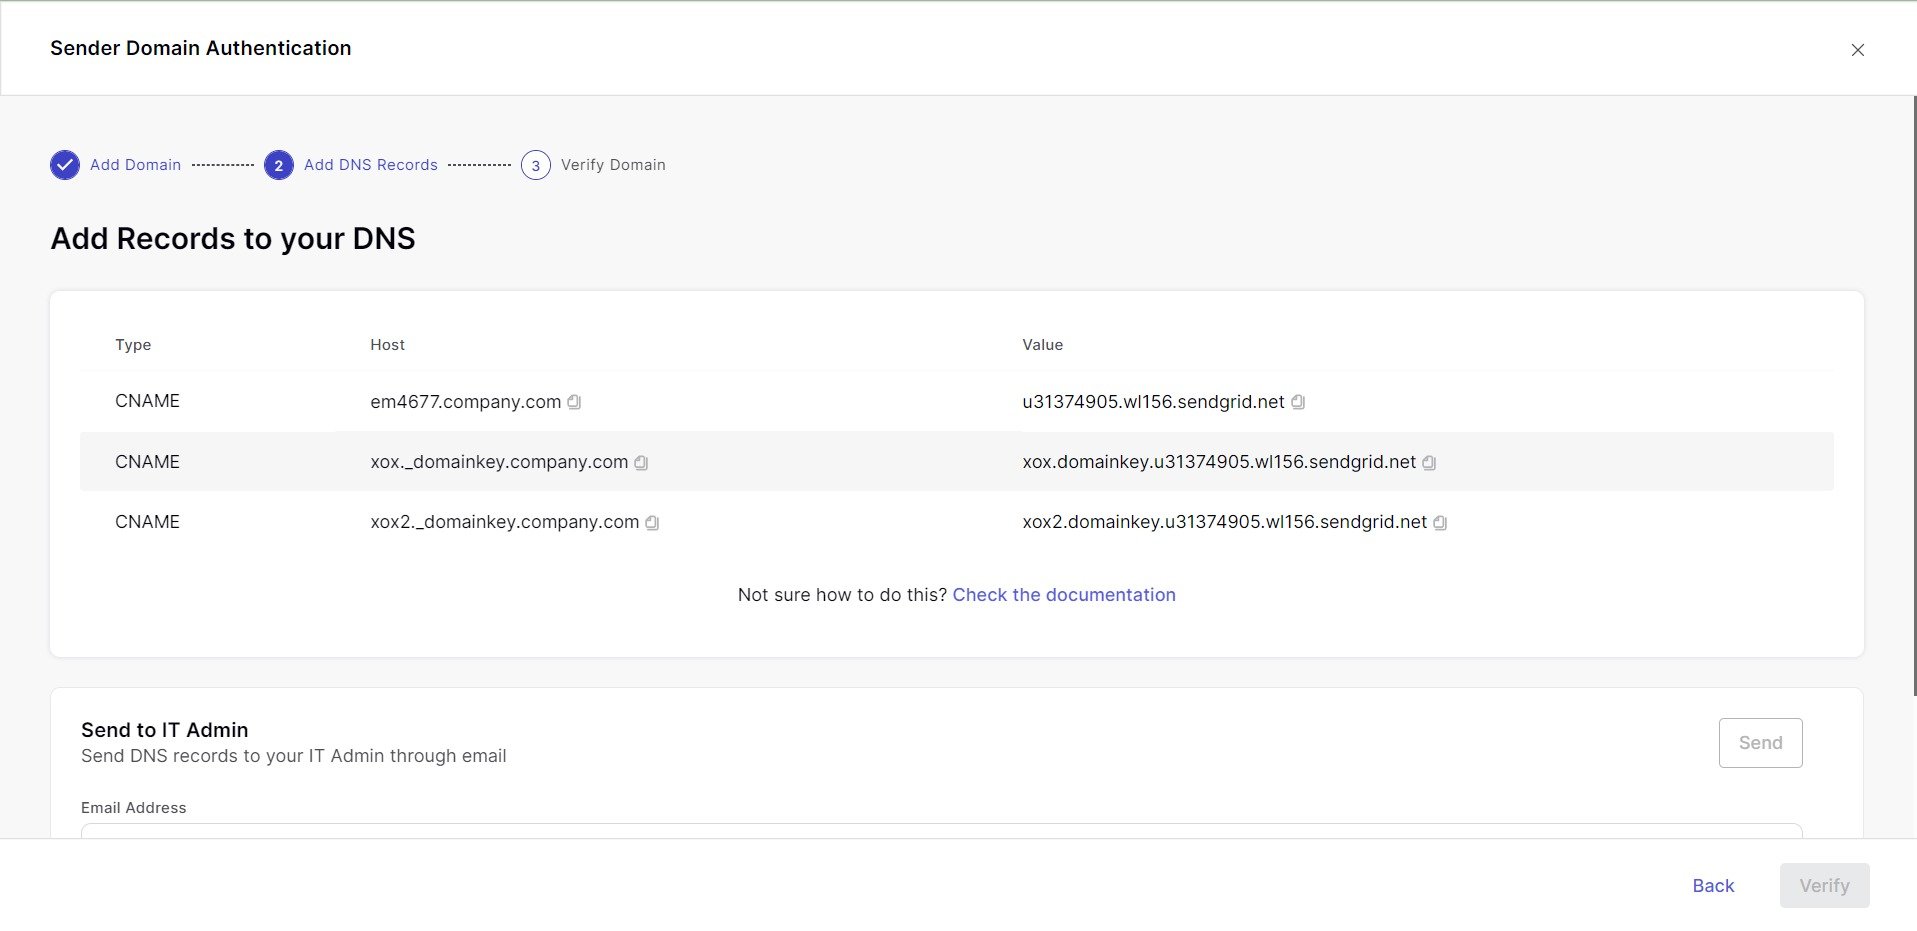 **Send DNS Records to IT Admin**
If you lack access to the DNS Manager Portal, forward these DNS records to your IT Admin or DNS Manager. The records will be sent via email along with a CSV file.
**Pro tip:** Coordinate with your company's IT Admin responsible for DNS management. You can use the inbuilt emailing tool to send the DNS records to your IT Admin colleague.
We will send DNS records in email along with CSV to your IT Admin.
**Send DNS Records to IT Admin**
If you lack access to the DNS Manager Portal, forward these DNS records to your IT Admin or DNS Manager. The records will be sent via email along with a CSV file.
**Pro tip:** Coordinate with your company's IT Admin responsible for DNS management. You can use the inbuilt emailing tool to send the DNS records to your IT Admin colleague.
We will send DNS records in email along with CSV to your IT Admin.
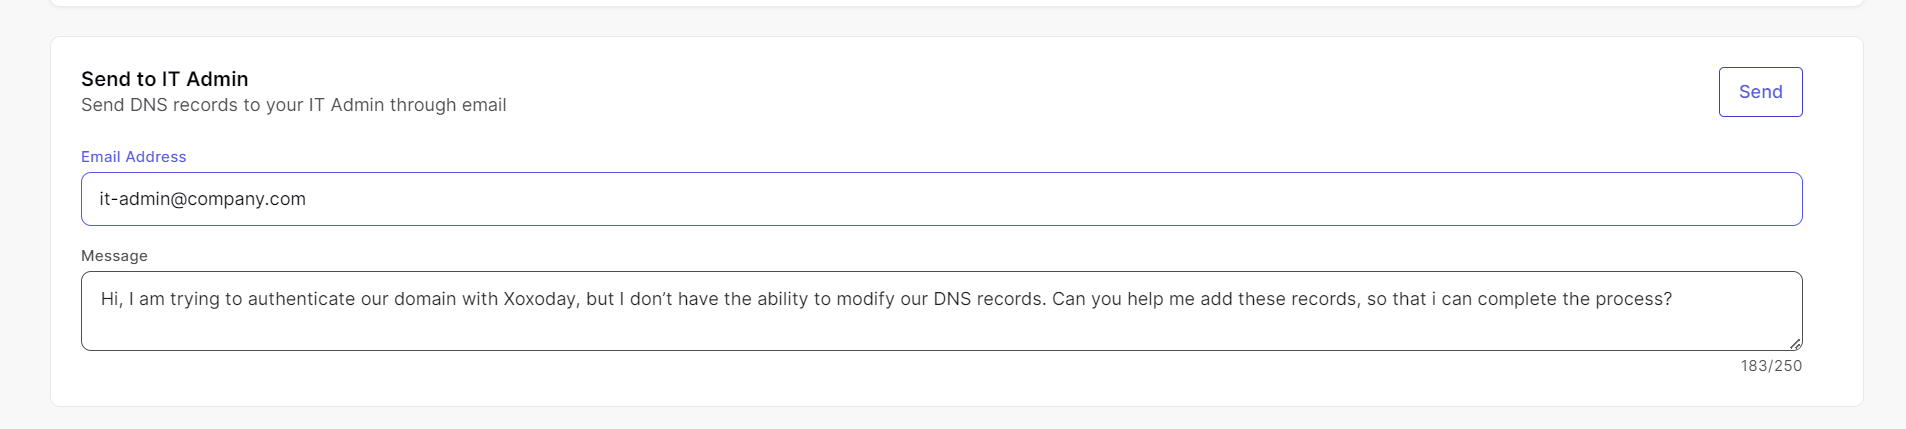 After the IT Admin has added the records:
* Check the box 'Please verify that your records have been added'.
* Once selected, the Verify button will activate. Click on **'Verify'.**
After the IT Admin has added the records:
* Check the box 'Please verify that your records have been added'.
* Once selected, the Verify button will activate. Click on **'Verify'.**
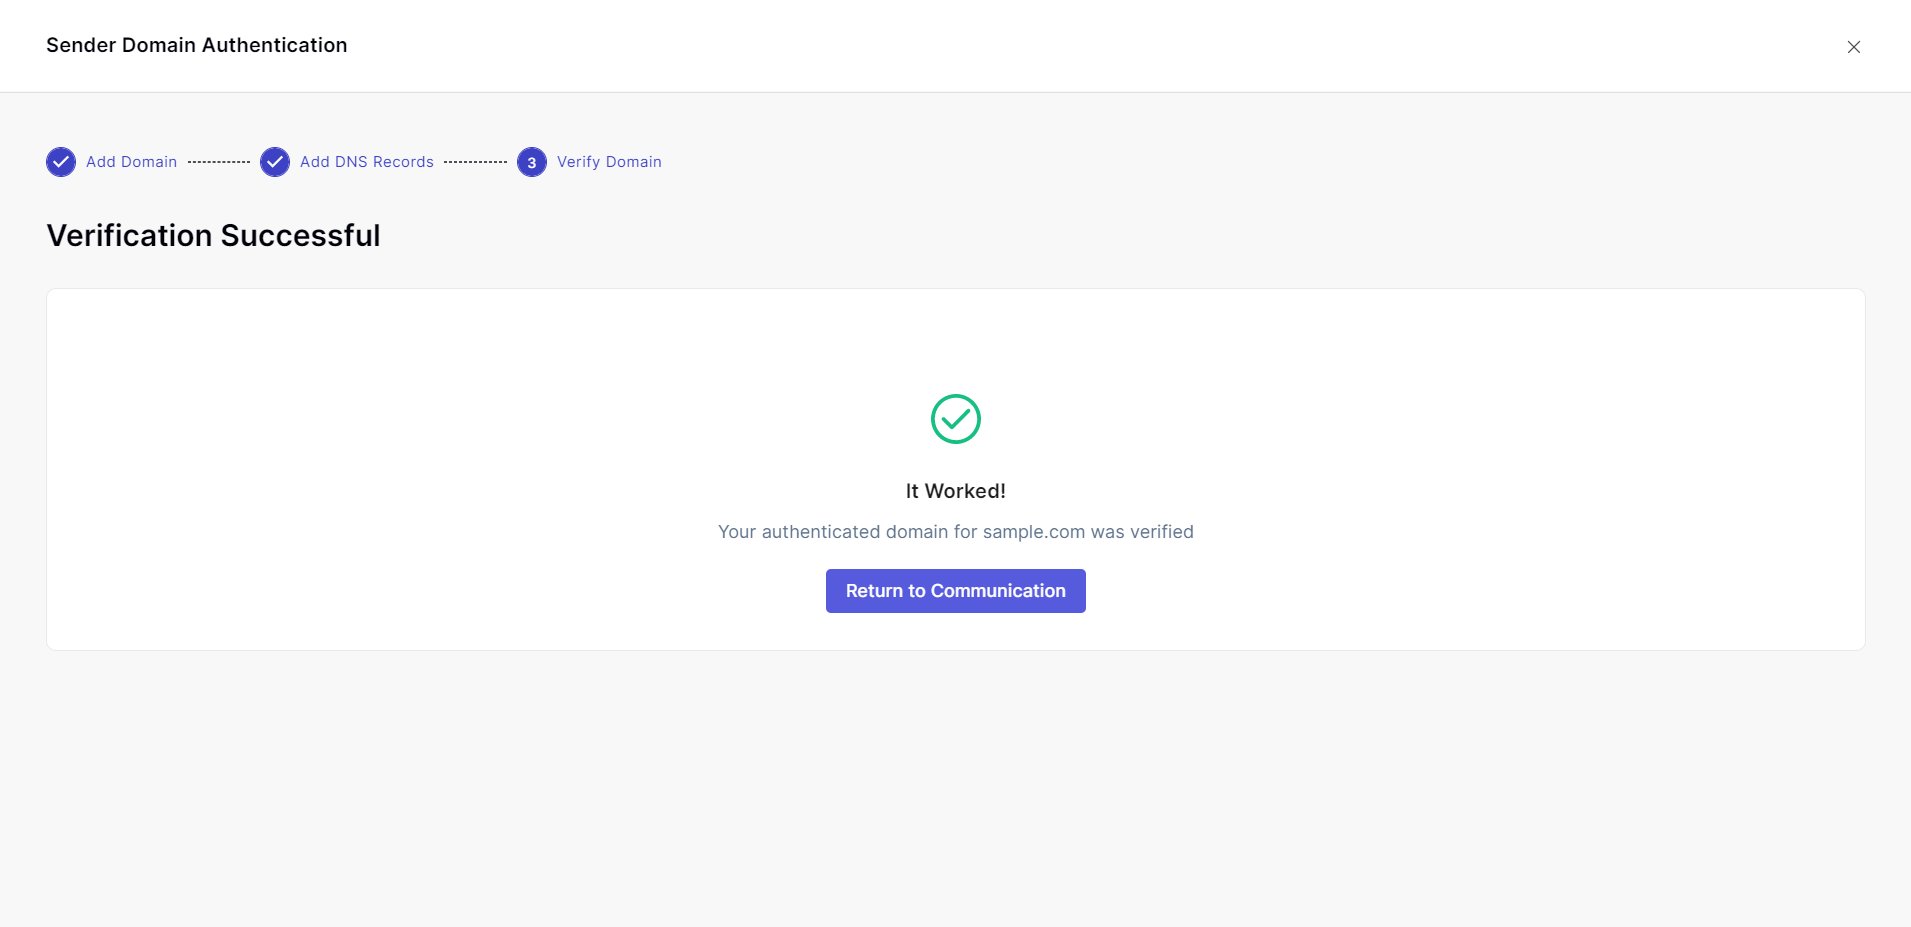
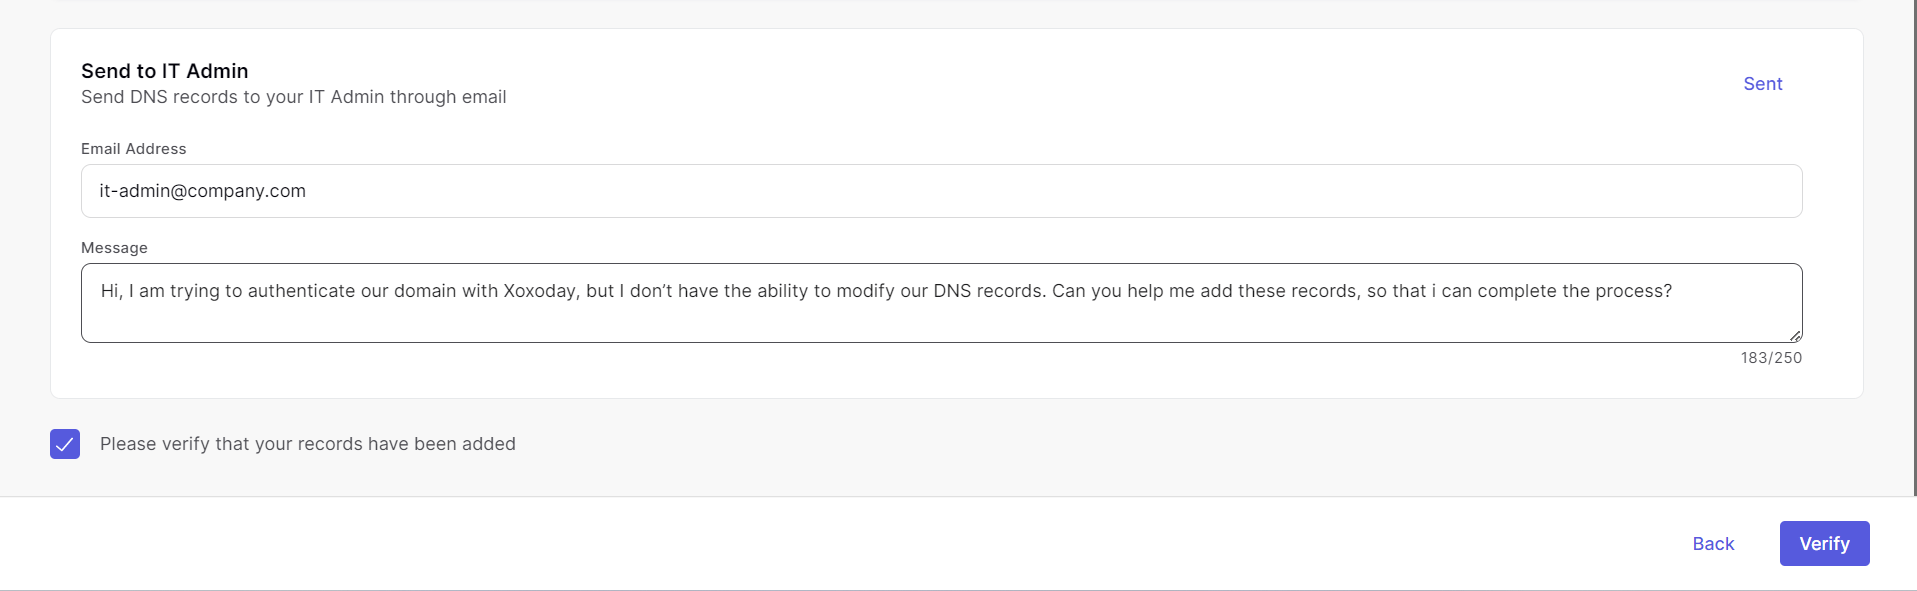 If your DNS records are added correctly and given sufficient time to take DNS changes to take place, on verification your domain is now authenticated.
 Feedback or Questions: Reach out to us at [cs@xoxoday.com](mailto:cs@xoxoday.com).