
Prerequisites
Before authenticating your domain, ensure that:- KYB (Know Your Business) verification has been approved.
- You have Super Admin access to the Plum Admin Dashboard.
- You have access to your organisation’s DNS Manager or hosting provider.
- If you do not have DNS access, coordinate with your organisation’s IT or DNS administrator to add the required records.
Step by step guide to Authenticate Your Domain
Ensure you are logged in as Super Admin with approved KYB. If not done already, head over to: Submitting Verification Details
1
Add Your Domain Name
Navigate to Settings > Notifications. Click on ‘Authenticate your Domain’.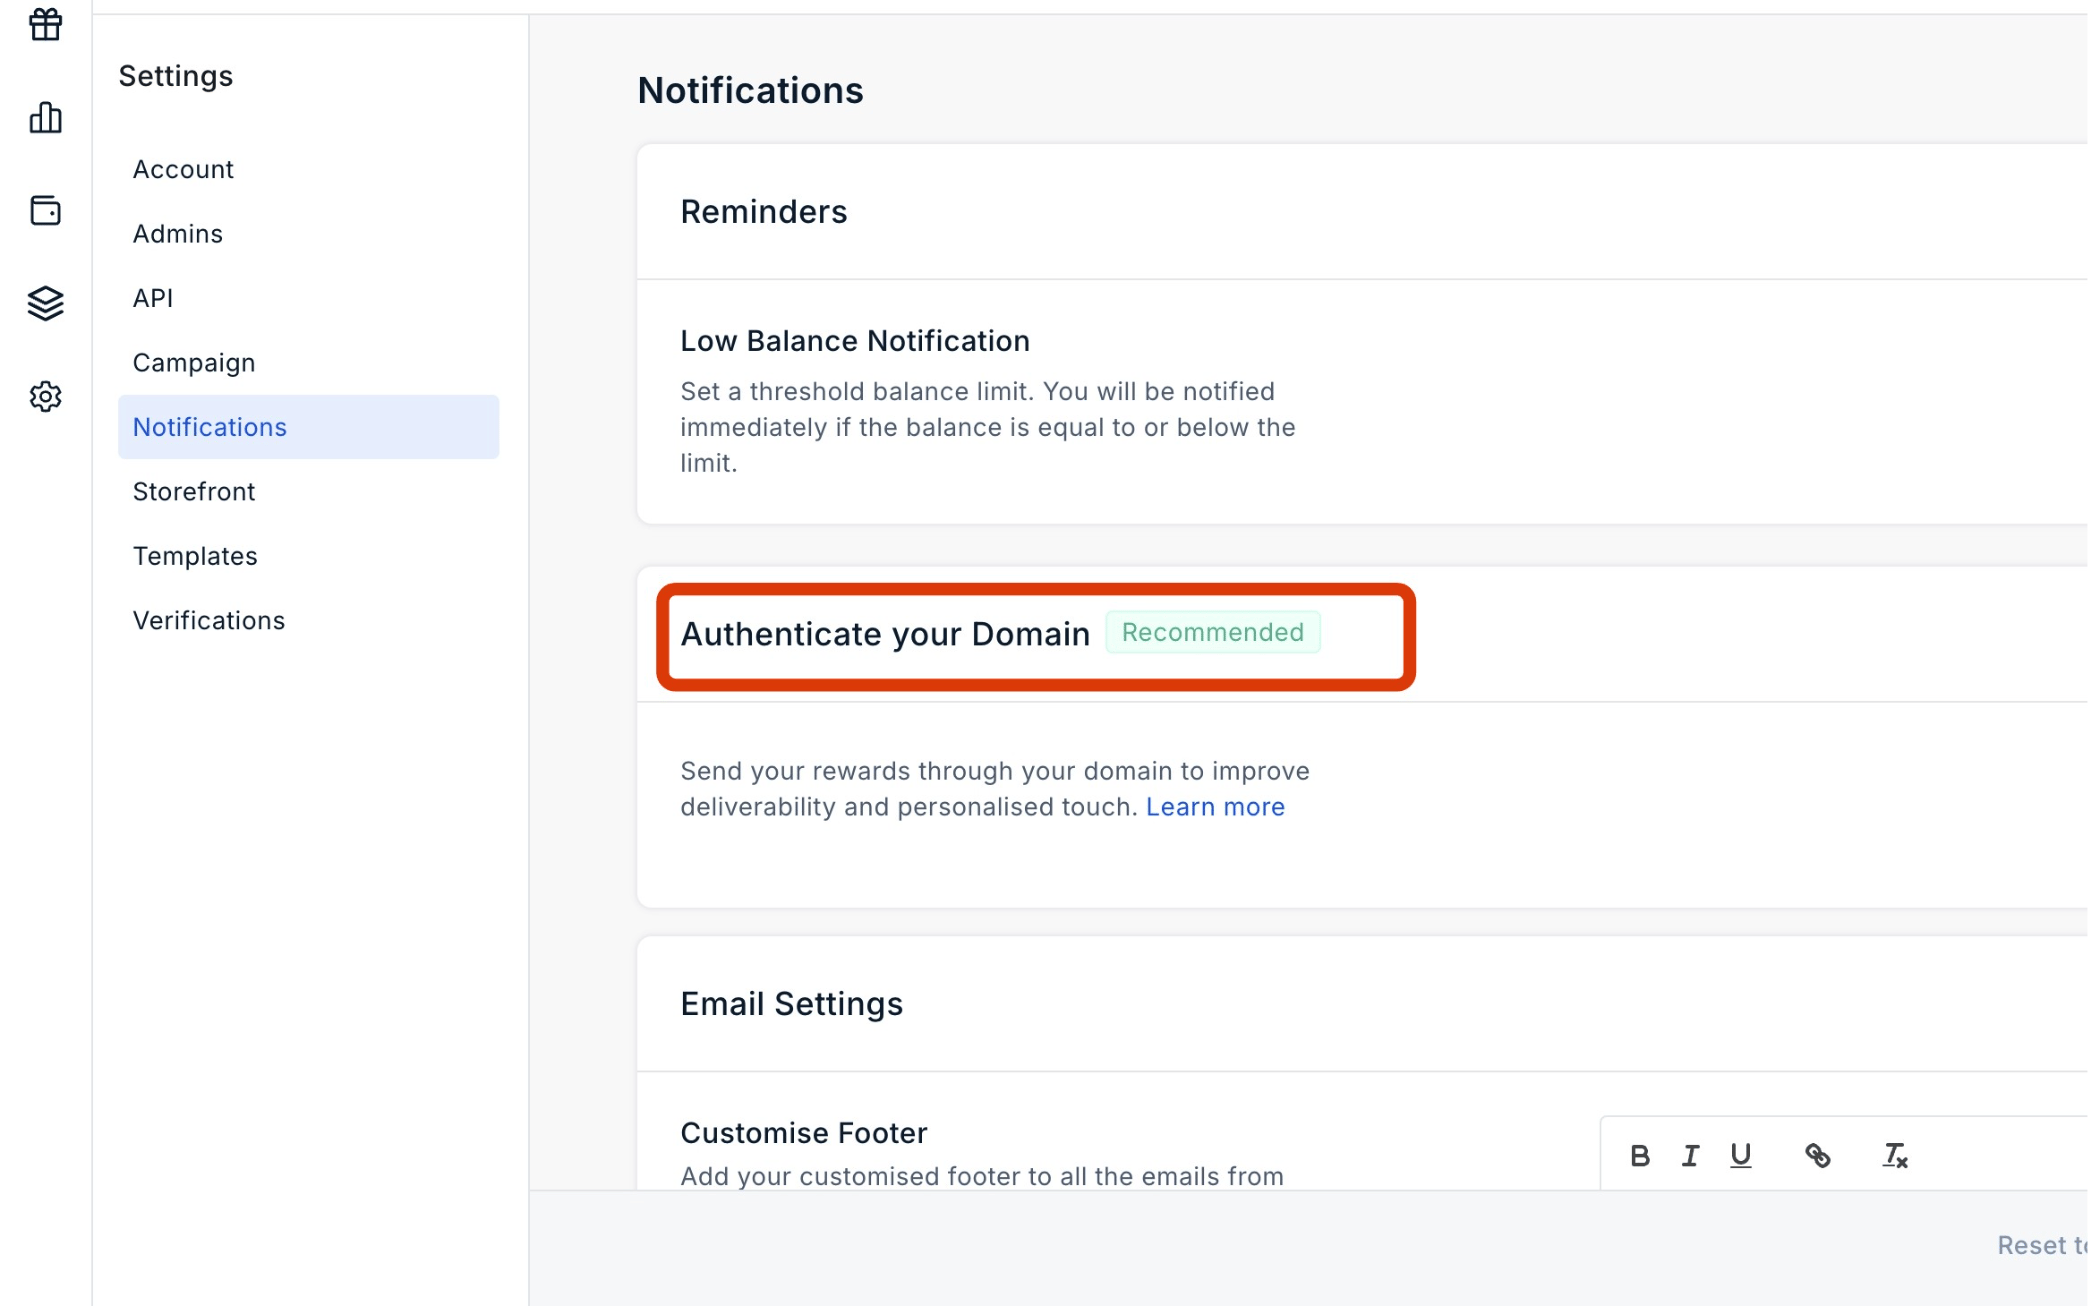
2
Add DNS Records to Your DNS Manager
The following DNS records need to be added in your DNS Settings. Access your DNS provider portal and input these records. Note that all records are CNAME.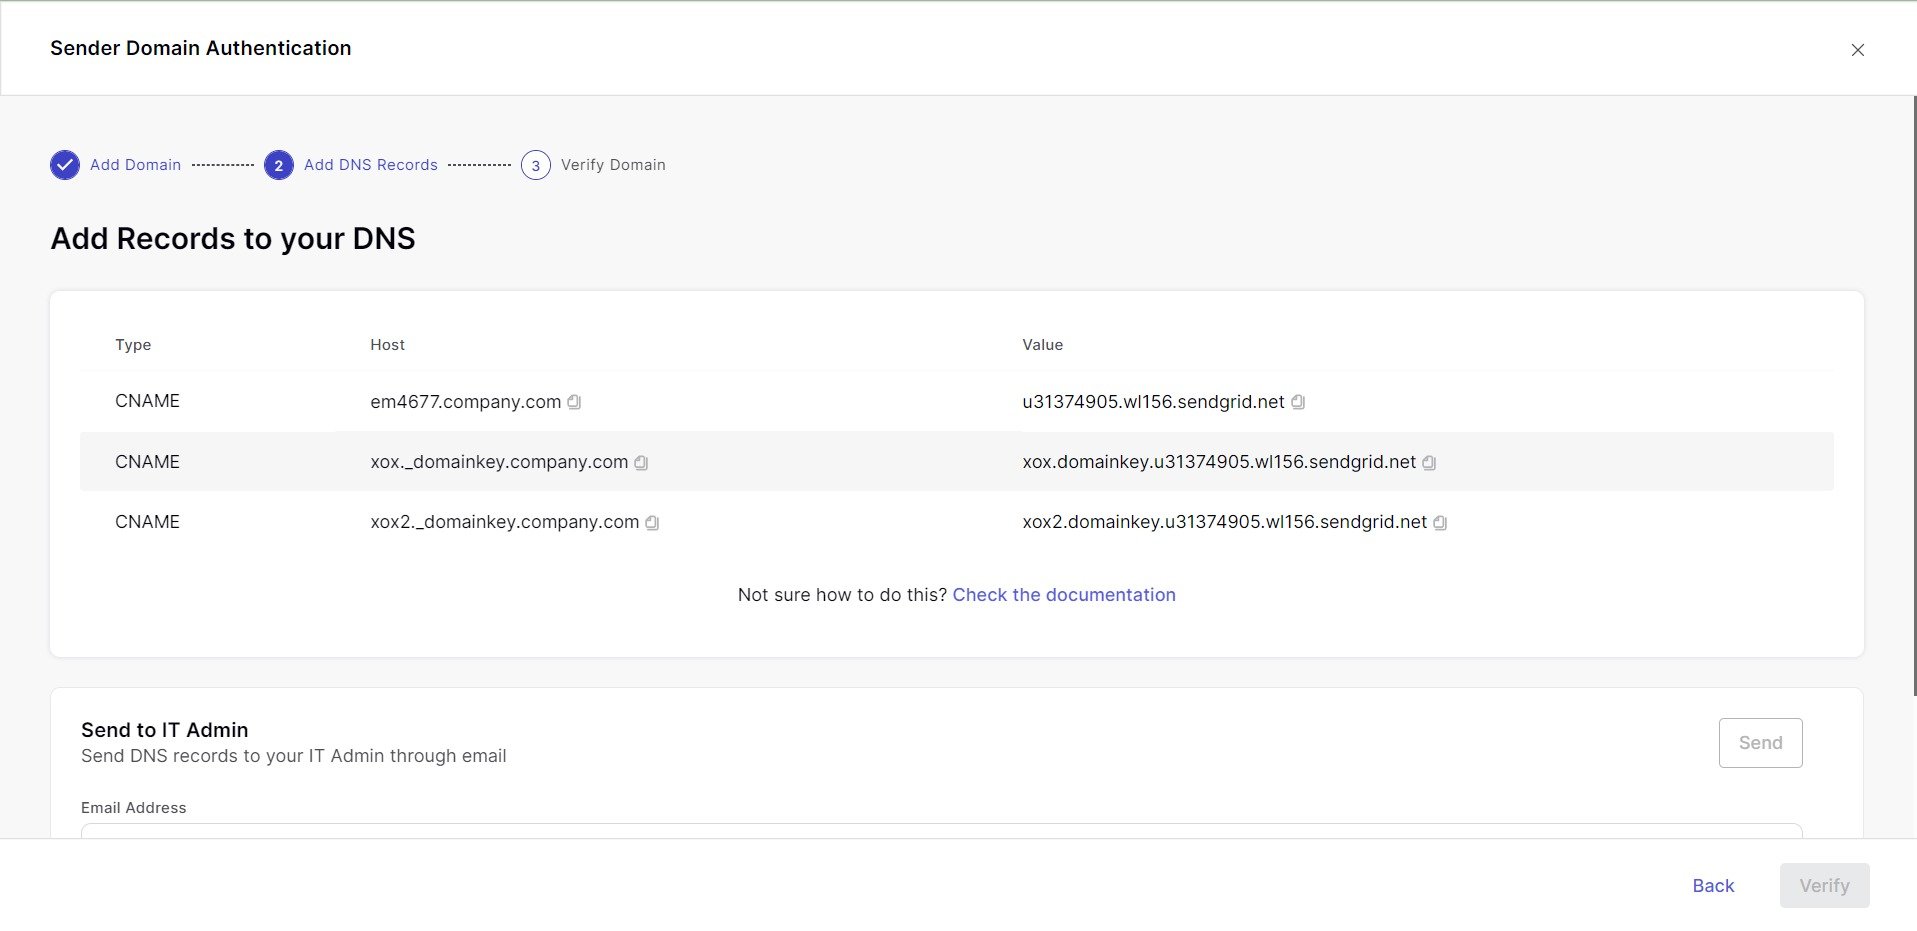
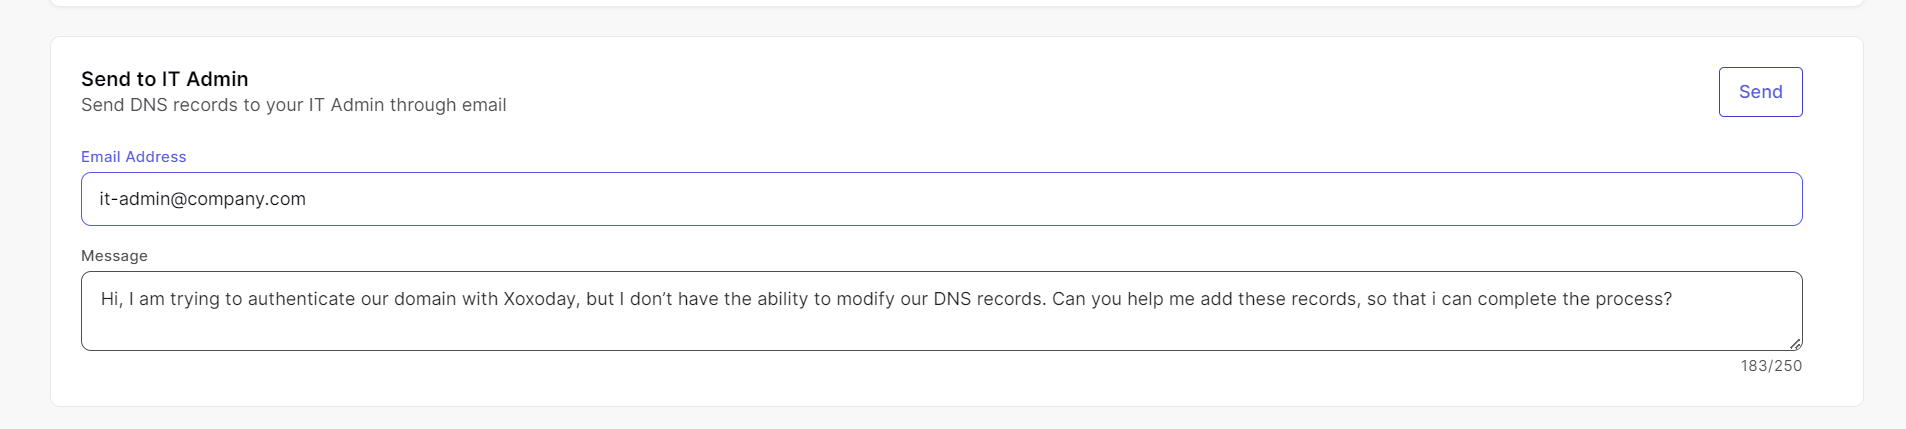
Pro tip: Coordinate with your company’s IT Admin responsible for DNS management. You can use the inbuilt emailing tool to send the DNS records to your IT Admin colleague.
3
Verify Domain
After the IT Admin has added the records: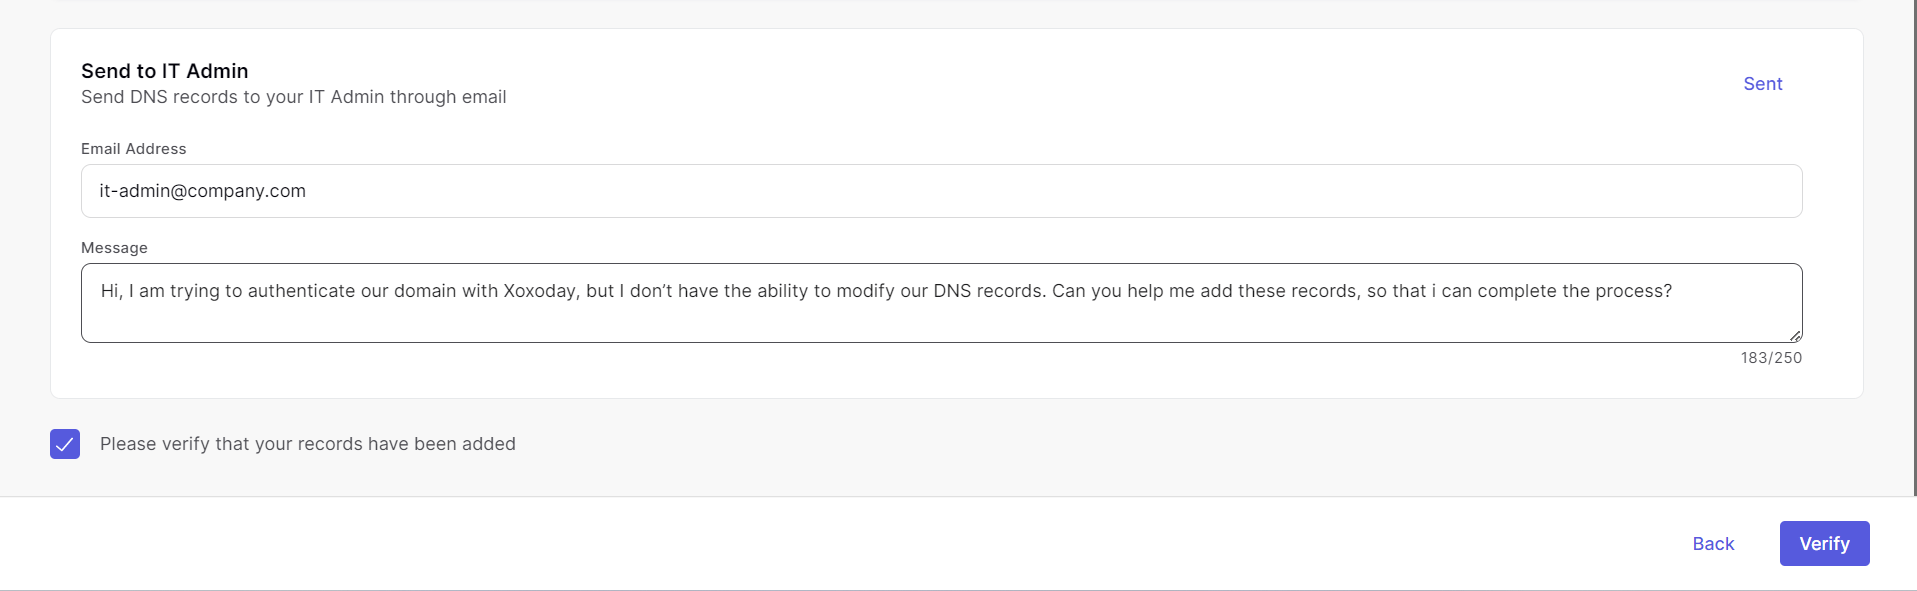
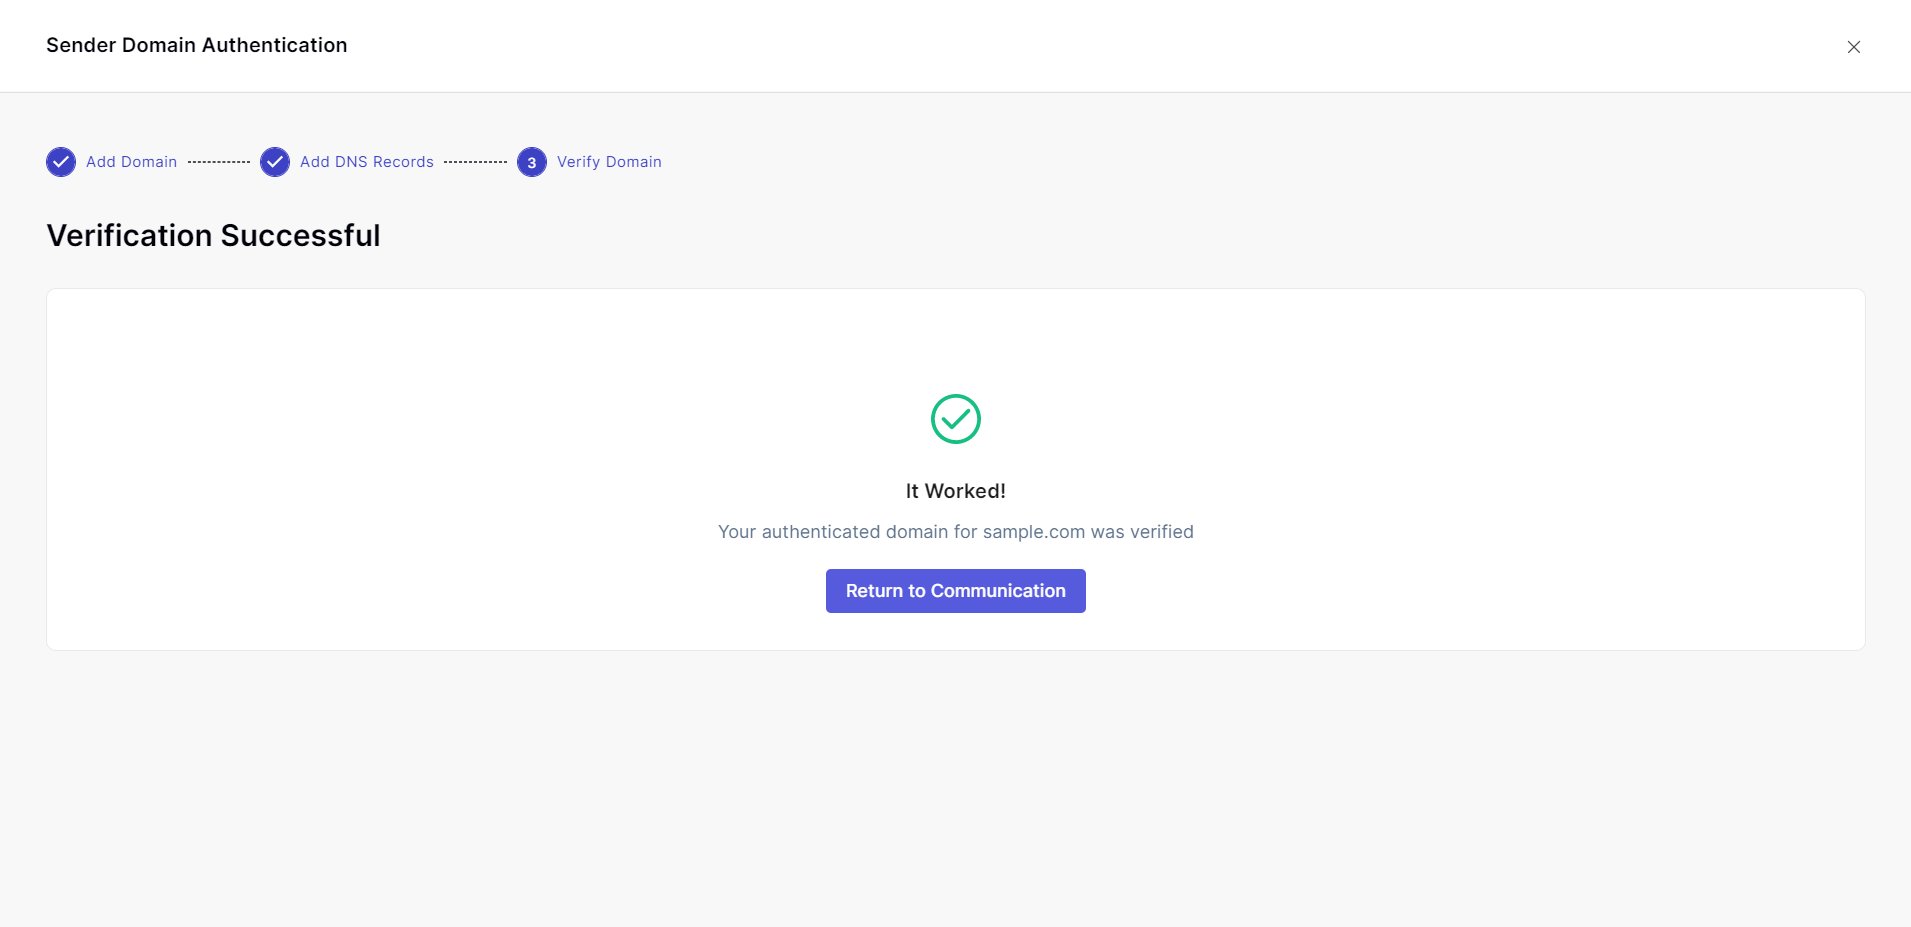
- Check the box ‘Please verify that your records have been added’.
- Once selected, the Verify button will activate. Click on ‘Verify’.